Showing posts with label Italian. Show all posts

Saturday, 26 October 2013

Got-tha Focaccia.

Focaccia 
Italian pronunciation: foˈkattʃa

This is one of my most favorite breads. I absolutely LOVE the variety of toppings that you can have on it and the lightness of the dough. The outside of the bread can range from bring soft to more of a thin crust. It all depends on where you buy it and who has made it!

Olives.
Simple salt and olive oil.
Smokey chilis.
Roasted red peppers.
Cured meats (proscuitto? YUM)

The toppings are endless!!

http://tishboyle.blogspot.ca/2010/08/rosemary-and-black-olive-focaccia.html
http://bluejeangourmet.wordpress.com/2010/01/08/focaccia/
http://kuala-lumpur-sur-seine.blogspot.ca/2013/06/cherry-tomato-and-rosemary-focaccia.html


I am no bread baker. I definitely am a noob in that field, but after enjoying The American Baking Competition this summer on the Food Network (pretttttty much the only TV I watch haha) I was inspired to try diving into this world more....


I learned the some basics from reading one of my favorite books (I've mentioned it tons and will continue to endorse it): Ratios by Michael Ruhlmanns'. I also watched the occasional episode of Baking with Anna Olsen- so many good tips and tricks! I'd highly recommend her show to learn more about baking basics.


When it came to September I had made a few basic things, but wanted to finally bake my first loaf of bread- from scratch! Now, why not just use a bread maker? Personally, I feel like they're a form of cheating and in the end they don't really save me time or money. They tend to be limited to making basic "sandwich" breads, I find that they aren't quite as fluffy as scratch-made bread because of the lack of rising times, and they are expensive (or can be).


One of the primary reasons I didn't ever make my own bread before was because I told it was really time consuming...If you browse recipes for bread making the total time is usually >2 hours which, as a student, that is an impossible amount of time to dedicate to making a single loaf of bread. BUT, what is the majority of the time dedicated to? The proofing period. This is the time when the yeast within the bread, metabolize the sugars in the dough and produce carbon dioxide, the dough rises and should double in size as a result. During this time, why not read a book? Do some studying? Call a friend? Dance around and sing some songs? Do some cleaning (my apartment always somehow needs cleaning! haha)


Don't be intimidated! :) Just use your time in a way that is productive for you!


Rosemary Sea Salt Focaccia


2.25 tsp dry active yeast

1 tsp sugar

2 cups flour

pinch salt (fine)

1/2 cup water (may beed 1/2 to 1 cup water additionally)

2 sprigs fresh rosemary

2-3tbsp olive oil

1 clove garlic

coarse sea salt (to taste)

Flour for surfaces


**Pre-cooking prep: turn on awesome tunes that are great and that you can either 1) sing along to because you think the words are great 2) sing along because you know the words and therefore can belt them out with a ton of passion or 3) 'sing along' to  but you don't actually know the words but pretending to sing, makes you feel like an opera singer and more Italian (therefore your bread is more Italian obviously).
Here is what I recommend (based on what I actually do haha):
for option 1: http://www.youtube.com/watch?v=Vf2YJAG84_8
         for option 2: http://www.youtube.com/watch?v=1y6smkh6c-0
                 for option 3: http://www.youtube.com/watch?v=jwhP4vZAh18

Now for the cooking:
1. Dissolve the yeast in 1/2 cup warm water with sugar until there is a lot of foam present. Set aside.


2. Add flour to mixer (with dough hook attachment) with a pinch of fine salt. Create a well in the center of the flour.


3. Add the frothy yeast mixture to the 'well' that you created in the flour. Turn the mixture on low speed and slowly add 1/2 cup water. Add additional water until the dough has become moist (but not wet) and has 'climbed' up the dough hook and been removed from the sides of the mixing bowl.

4. Place dough on floured surface and gently knead with your palms (push forward with palms, then pull the dough back with your fingers). Do this until the dough has some resistance and feels elastic. Do not overwork the dough! Make the dough into a round ball. 

5. Use olive oil to coat the inside of a large bowl. Place the dough into the bowl. Cover with a damp towel and place in a room temperature (or slightly warmer than room temperature), draft free space for 30-60 minutes (until double in size). This is your first study break!
I put mine in the sun on my balcony :) Perfect spot!


6. Roll the dough out on floured surface. Shape into what shape you want your final foccacia to look like! Place this dough on a non-stick baking sheet. Cover with towel and let proof for another 30 minutes. This is your second study break!

7. Preheat oven to 470F

8. Use your index finger to make indentations throughout the top of the foccacia bread


9. Mix fresh rosemary and olive oil in a small bowl. Spread this, and chopped garlic pieces  across the top of the bread. Finish with generous sprinkling of coarse sea salt.


10. Bake for 10 minutes (soft) or longer (15minutes) for a crust. I baked mine for 10 minutes to get a really light bread but bake for longer if you want more crust! :)

** if you want to have a really good crust on the bread the while baking, have a pan of water also in the oven. The steam from this water in the oven will help to crisp the outside of the bread!


ENJOY! :)

Sunday, 13 January 2013

Omelet vs Quiche vs Frittata?


Eggs: versatile and delicious. 

Whether for breakfast or brunch, lunch or dinner, they can add richness to a pasta, top a messy hamburger, boiled and be mashed, be scrambled, baked, fried etc. There are endless things to do!

Three of the most popular ways of making eggs is in the omelet, quiche or frittata forms. They are quite distinct and you may, to your own surprise, may have been confusing them all these years and not known it! Let's do a little myth-busting shall we?

From when I was at the Calgary
Stampede this summer: eggcellent.
Omelet: made with or without egg yolks, it is technically not supposed to incorporate any vegetables or toppings into the egg mixture itself. An omelet is strictly an egg mixture that gets cooked and then wrapped around the fillings of your choice!

Frittata: the fancier omelet. It can be made with or without egg yolks and is essentially an omelet with the toppings mixed into the egg mixture. It also, is open faced and generally served at room temperature (that's why it is more common at brunch) unlike omelets. This makes sense since all the toppings are incorporated; however, makes the cooking process a little more complicated. I find that sticking my pan in the oven is a great way to get the top cooked without burning the frittata through the bottom on the stove. I think prefer this to a traditional omelet because it makes sure that every bite has some yummy topping incorporated. 

Quiche: So Good. This is a step up from fritatta: It has a delicious crust and it's egg mixture is somewhat different. It is actually classified as a "custard" filling because it is made of eggs and milk or cream which is then baked and...becomes a custard (although atypical because most custards are made without egg whites). 

Here's another Italian-inspired creation from my kitchen to yours!

Mediterranean Frittata

2 tbsp olive oil
This is what you have to look forward to: so yummy.
125 mL egg whites
1/4 cup almond milk
Half medium onion
5 cherry tomatoes
1/2 red pepper 
1/4 cup frozen corn
1 cup spinach (or more!)
1 tbsp minced garlic (~ 2 cloves)
1/4 cup sliced sundried tomatoes (~ 5)
1 long scallion
5 fresh basil leaves

fresh parmesan
salt and pepper

lactose-free cottage cheese
hot sauce of choice

Preheat oven to 400C- move to middle rack. Heat skillet with 2 tbsp olive oil. While heating up, mix egg whites and milk. Whisk until it begins to froth (this makes the eggs become super airy and light when cooked!). Dice the onion and place in hot skillet. Let the onions brown. If they begin to stick to the pan, add a couple of tablespoons of water to steam them and deglaze the pan (lift the flavors from the bottom of the pan). While onions cook: dice red pepper (or frozen roasted red peppers) and slice cherry tomatoes lengthwise, chop basil (see How to Cut Basil Properly in cooking instructions), scallion, slice parmesan to taste (save these for later). Add diced pepper, frozen (or fresh if you have it) and tomatoes to pan. Let these soften and then pour the egg mixture over top. Top with spinach (push the spinach into the mixture but not too far down; just enough to be incorporated into the frittata but not submerged. We don't want them to become mush while cooking here or crispy when in the oven later).  Add sundried tomatoes over the entire top and a pinch of salt and pepper to taste. When the egg mixture is cooked around the edges (approximately 1.5 inches from the edge of the skillet) place in the oven for ~5 minutes until the remainder of the top is cooked. Remove from oven, sprinkle with fresh basil scallions and parmesan to taste. 

I like to eat mine with a little kick so I use hot sauce as well and then cool down each bite with a little lactose free cottage cheese :)

Must say: I make a mean frittata.

If you want to attempt to remove it from the pan, here is a trick: DO NOT LIFT IT WITH ANY UTENSILS. Place a cutting board, plate or whatever you want to flip it onto, over the top of the skillet. Flip them (the skillet and the thing you are flipping it onto) at once and the frittata should slip out of the pan onto the surface (albeit upside down but still, it looks GREAT)...or you can serve it from the skillet. Remember, these are generally served at room temperature.

Buon Appetito! 
[Italian: Have a Good Meal!]

Sunday, 6 January 2013

A Sunday Lunch.


From when I was in Venice. Beautiful.


St. Michael Square in Venice.
Pizza? 
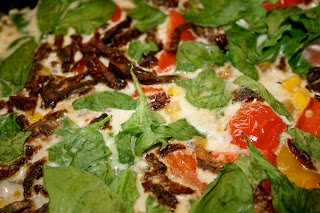
A Canadian comfort food at its finest. Usually it comes loaded with about an inch of cheese on top and with a thick hearty crust, making it quite a heavy entree. When I was in Italy (aka the mother-land of pizza) in 2010 and 2011 I noticed something about their pizza, it was neither round nor heavy. In fact, it was topped with fresh, fragrant ingredients that invited you to savor your lunch, enjoy the flavors and explore all the possible topping combinations. I was inspired and intrigued. The appearance of prosciutto, artichoke hearts, basil, fresh cheeses, garden vegetables and savory marmalades were atop many pizzas in not just the "gourmet" restaurants, but in the everyday pizza joint. Fantastic.

Pizza is not rigid. It is a canvas to create a complex flavor profile that can suite any palate; so let's get creative people!

Came home from church today in the mood for something savory. With snow on the ground, there is nothing greater than a delicious sunday lunch with a nice hot cup of President's Choice Chocolate Mint tea and a pizza creation that is low calorie, packed with nutritious ingredients and tailored to moi!

Ingredients

For Pizza
4 fresh basil leaves
1 scallion
4 pitted, dried dates
4 slices sun-dried tomato (not packaged in oil preferably)
paprika
olive oil
fresh parmesan

For side salad (adjust vegetables to taste)
spinach
cherry tomatoes
snow peas
cucumber
red pepper

To make:
The finished product!
Preheat oven to 300C. Move rack to top level.
Place wrap on baking sheet for assembly. Spread apricot jam onto the wrap- Make sure to keep the edges of the wrap clean. This will allow for a "crust" to form when baking, and allow for easy handling. Chop fresh basil (to properly cut: roll the leaves together and then dice all the leaves at once; this should give you strips of basil without mushing the leaves and releasing valuable, flavorful oils onto the cutting surface). Slice the pitted dates and sun-dried tomatoes into pieces along their width. Chop scallion into small rounds; not too large as their flavor is quite strong. Scatter the dates, sun-dried tomatoes, scallions, and some of the chopped basil even across the wrap. Sprinkle paprika (I prefer unsmoked) over top, and then drizzle olive oil for moisture. Put in oven for ~10 minutes or until the edges begin to curl up and the wrap becomes a toasted color. Assemble salad while pizza is cooking. When finished, sprinkle the left over basil overtop and finish with fresh parmesan.

Rustic. Yum.
Possible variations? Whatever you want! It's about being creative! Add cinnamon to enhance the sweetness. Maybe some other types of jam. Tomato sauce can also be used. Add some meat or even some toasted cashews at the end. It's your creation, so follow your heart...and taste buds.
Related Posts Plugin for WordPress, Blogger...